These instructions cover the installation of the External Pressurization Kit (EPK) which can be done with either a new Raycol Metering Unit or the genuine unit.
This kit only needs to be installed on air carts that where factory supplied as double shoot.
This purpose of the valve is to change where the air is sourced that pressurizes the tank, so as to not over pressurize the tank when seeding small seeds such as canola.
If you require any further assistance, please contact our office.
Warning: Do not use an impact wrench to tighten stainless nuts as this may cause galling which will seize the nut to the bolt and make it impossible to remove.
We recommend applying a small amount of lubricant (i.e. ant-seize or lanolin based) to the thread before tightening nuts.
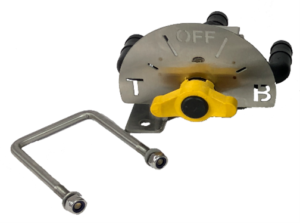
Banjo Valve with TOB Indicator
Using the supplied U-Bolt. Mount the Banjo Valve to the frame of your Aircart.
The photo shows the recommended location but it can be fitted anywhere along the frame on the same side as the meter roller.
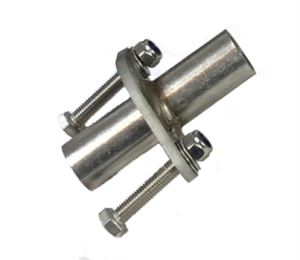
Tank Flange
Using a 25mm (1 inch) hole saw, cut a hole in the tank near the ladder for the tank flange.
Using the tank flange as a guide, mark and drill two 10mm holes for bolts then install the bolts from the inside of the tank, the tank flange to the outside then the washers and nylon locking nuts. We recommend using a small amount of sealant on the outside to seal the flange to the tank.
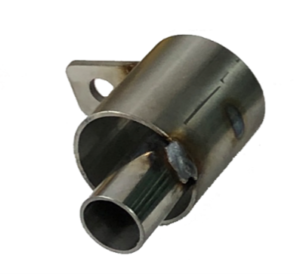
Pressurization Hose Attachment
The Tank Ladder Bracket needs to be mounted to the top of the inside of the tank near the ladder.
Remove the nut from one of the existing bolts holding the lid, install the Tank Ladder Bracket and then the nut.
25mm Hose and Hose Clamps
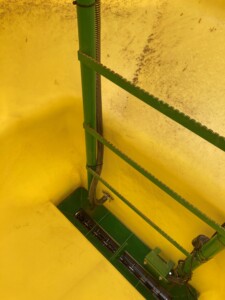
Using the supplied hose and hose clamps from the inside of the tank, run the hose from the Tank Flange up the side of the ladder to the Pressurization Hose Attachment. Secure the hose to the ladder using cable ties (not supplied).
On the outside of the tank run the hose from the Tank Flange to the centre barb on the Banjo Valve and secure with hose clamps at each end.
Run one length of hose from the top bleed off near the air plenum to the “T” or Top side of the Banjo Valve, secure with hose clamps.
Repeat the process with the bottom bleed off to the “B” or Bottom side of the Banjo Valve.
Finally, secure the hoses to the frame or together other where possible.


